Tool development using the Tool Maker
This guide helps you to quickly get started using the Tool Maker, a software included in the QMENTA SDK library, that will enable you to develop a tool that can be easily integrated in the QMENTA Platform. In the following sections we will show you step by step how to:
Set up the Tool Maker in your computer
The Tool Maker is a part of the QMENTA SDK library. When installing the SDK library in your computer, the Tool Maker will also be accessible via command line. No further set up is required to use the Tool Maker. In the following chapters you will see how the Tool Maker is used to create the tool and imported to use it to its full potential.
Create a new tool
The Tool Maker empowers you to create tools for the QMENTA Platform in a simple way. It will automatically generate all the files required for implementing your tool without having to worry about how they need to be configured. The first step is to call the graphic interface:
/home/myfolder$ tool-maker
It will show something similar to the following screenshot
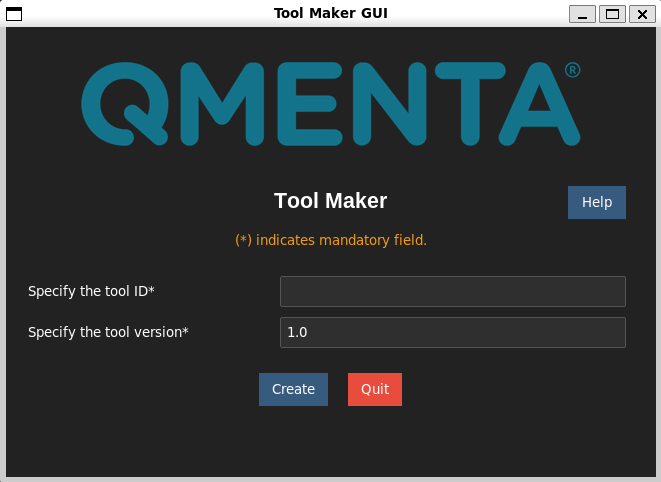
The process involves specifying the ID of the tool, which will be used to create a dedicated folder for storing generated files.
The generated files include the main Python code (tool.py) and a test folder (local/test/).
Usage:
Call the GUI by running
tool-makerin your terminal in the environment where the SDK was installed.Specify the tool ID as an underscore-separated, lowercase sentence (e.g.,
my_first_tool,advanced_dwi_model). It will be used to name the main tool folder and the docker image name by default.The tool files will be generated in the folder where the GUI was called (e.g.
/home/myfolder), inside the/home/myfolder/local_tools/directory which is automatically generated by the Tool Maker.
Generated Files:
/home/myfolder/local_tools/
                   └─ my_first_tool
                          ├─ description.html
                          ├─ local
                          │    ├─ Dockerfile
                          │    ├─ requirements.txt
                          │    └─ test
                          │        ├─ sample_data
                          │        └─ test_tool.py
                          └─ tool.py
tool.py: Main Python code to execute the tool.description.html: Description of the tool in html format. It will be shown in the front-end when selecting the tool. It should explain what the tool does and which ones are its requirements very briefly.local/test/Dockerfile: Defines the Docker image used to build and run the local test environment.local/test/requirements.txt: Lists the Python dependencies required for testing.local/test/sample_data: Contains example input data for running basic test cases.local/test/test_tool.py: Implements the test cases that validate the tool’s functionality and expected behavior.
Main python script: tool.py
This section outlines the process of creating a tool from the automatically generated sample tool. The Tool Maker defines for you the Tool class and its methods, providing default values and examples to replace with the appropriate code. Comments and references are included to facilitate the understanding of the tool creation process.
After the tool’s class is defined, the developer can find another method called run():
def run(context):
  TOOL_CLASS().tool_outputs()  # this can be removed if no results configuration file needs to be generated.
  TOOL_CLASS().run(context)
This is the function called by the QMENTA Platform tool executor in the cloud.
It will be calling the tool_outputs() and the run(context) method inside the class, which runs the processing part.
The tool_outputs() will generate the results configuration, which will be explained later in detail, if the user has defined it. Otherwise,
if the tool does not require any special configuration for showing the analysis results, it can be removed.
Begin populating the tool class’ various elements. The following functions within the tool class contribute to the QMENTA Platform’s front-end.
tool_inputs()
This method is used by the Tool Maker to complete the settings.json file. This configuration
file provides the information to show the parameters when selecting your tool in the QMENTA Platform:
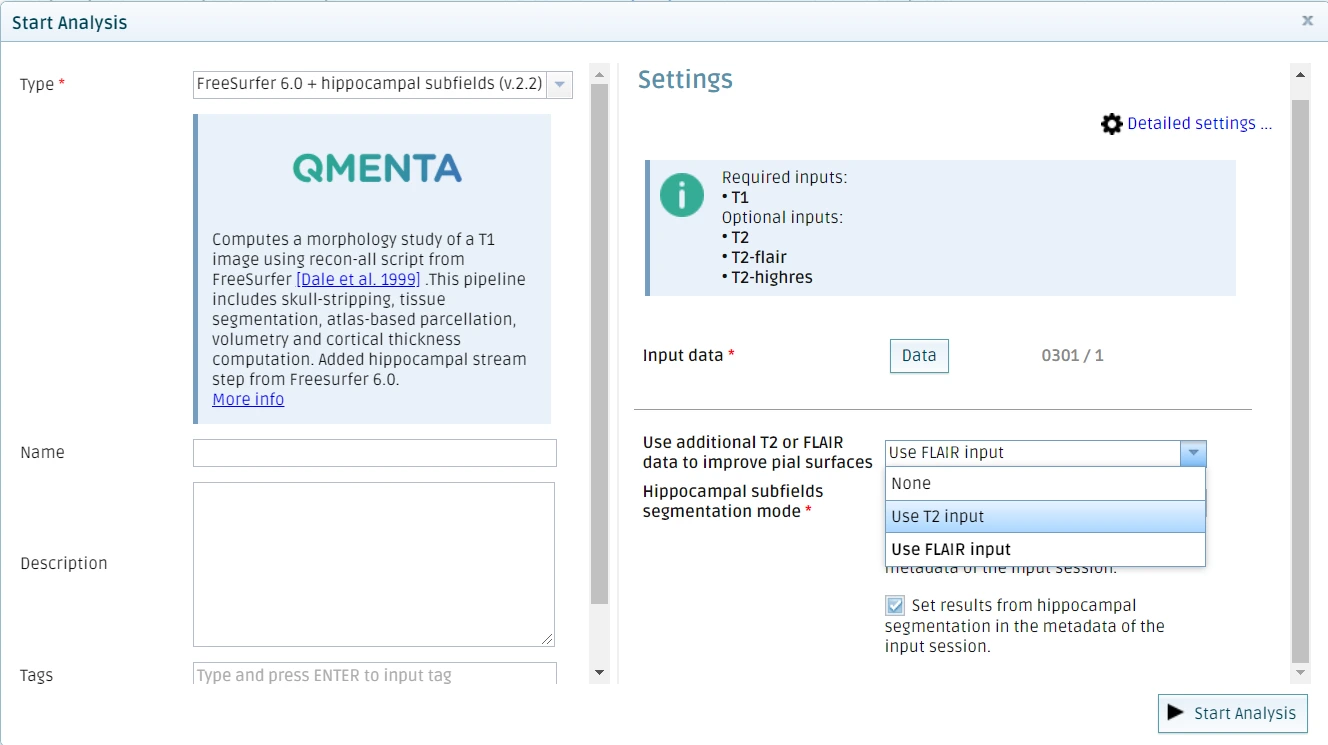
It will convert the different functions into the proper JSON file to be used in the tool in the QMENTA Platform. The possible settings to be configured in a tool are:
Input container (
add_input_container):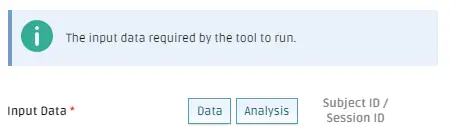
Note
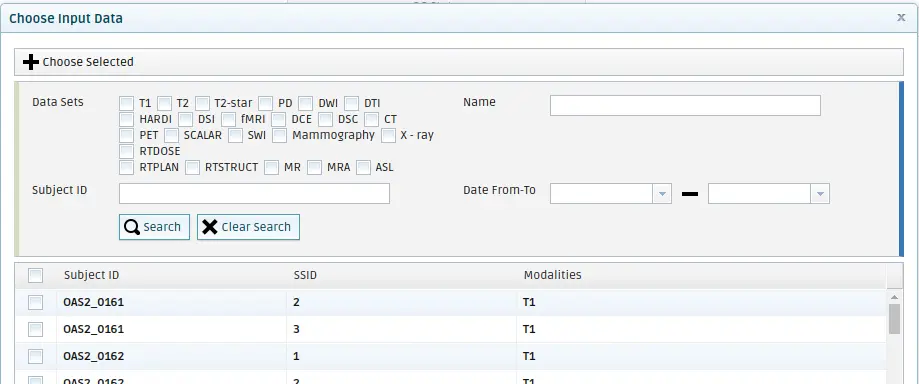
The Data button allows you to select uploaded sessions in your project as inputs. A pop-up window will appear. You may select one or multiple sessions as input.
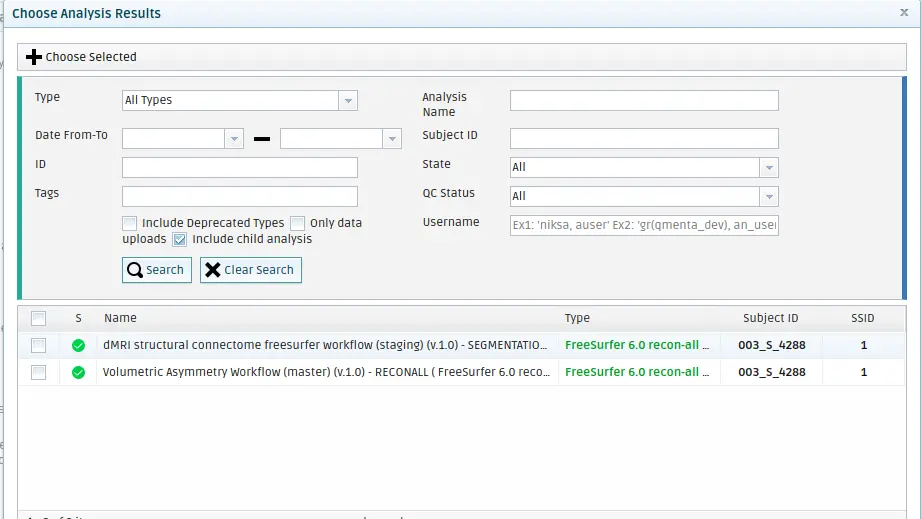
The Analysis button allows you to select a finished analysis in your project as inputs. To enable this,
add the argument tool_codes_set_as_input and add the tool codes from the tools you want your current
tool to get their inputs from.
Checkbox (
add_input_checkbox):
Input string (
add_input_string):

Input decimal number (
add_input_decimal):

Input integer number (
add_input_integer):

Input dropdown menu (
add_input_single_choice):

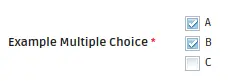
Input multiple choice (
add_input_multiple_choice):
Other methods implemented in the Tool class are utilized to add information or format the settings section of the tool:
Indent (
add_indent):

Horizontal line (
add_line):

Heading (
add_heading):

Information textbox (
add_info):

To gain a better understanding of how to write these methods, refer to the SDK template generated when creating the tool using the Tool Maker user interface. Replace the values appropriately based on your tool’s requirements. Additionally, consult the code documentation, especially the add_input_container documentation, for detailed instructions. For comprehensive information about input parameters, please consult the SDK documentation section
run()
This section outlines the key functionalities within the tool script,
focusing on data processing and result production. The run() method encompasses the data processing segment of the
script, where results are generated, and the SDK may be employed to
upload result files to the QMENTA Platform and set metadata values to the input session. To streamline input
handling, utilize the self.prepare_inputs(context, logger) command,
which automatically downloads and stores all tool inputs in the self
object. Access file handlers using the container_id and
file_filter_condition_name:
c_files_handlers_list = self.inputs.input_data.c_files
Where input_data is the container_id and c_files is the file_filter_condition_name.
The variable c_files_handlers_list is a list of handlers, with each
element representing a file object. Refer to the SDK
documentation
the see the available functionalities
Retrieve the path and other information of a file (e.g., from the first object in the list) using:
input_data_path = file_handlers_list[0].file_path  # path of the file inside the Docker container
input_modality = file_handlers_list[0].get_file_modality()  # Modalityof the file being currently handled
input_tags = file_handlers_list[0].get_file_tags()  # List of tags from the QMENTA Platform of the file being currently handled
input_info = file_handlers_list[0].get_file_info()  # Dictionary with the file information of the file being currently handled
Upon identifying local files, proceed with processing of the different files.
After generating output files, use the following command to upload them to the QMENTA Platform:
context.upload_file(
  source_file_path=result_file,
  destination_path="T1_final.nii.gz",
  modality=str(Modality.DTI),
  tags={"eddy"},
  file_info={},
)
Add information to the session’s metadata directly from the tool and verify it in the QMENTA Platform frontend:
context.set_metadata_value(key="metadata_key", value=100)
tool_outputs()
This method is employed by the Tool Maker to complete the results_configuration.json. It will create the configuration for the results visualization in the QMENTA Platform
which consists of different widgets (PapayaViewer and HtmlInject) and layout representations (Splits and Tabs).
# Main object to create the results configuration object.
result_conf = ResultsConfiguration()
Adjust the layout of the results using the following methods:
Split(): Divide the window horizontally or vertically to present different elements simultaneously. To create a split, specify which elements are going to be shown in thechildrenparameter. Each children must have the parameterregiondefined, which allocates the element in the screen. It can be:Region.left: for vertical screen splits defined with OrientationLayout.vertical
Region.right: for vertical screen splits defined with OrientationLayout.vertical
Region.top: for horizontal screen splits defined with OrientationLayout.horizontal
Region.bottom: for horizontal screen splits defined with OrientationLayout.horizontal
Region.center: for any screen splits defines a central position. If element A is “center” and element B is “left”, element A’s will become, “right”.
split_1 = Split(
    orientation=OrientationLayout.vertical, children=[papaya_1, papaya_2], button_label="Images"
)
Two papaya viewers in a vertical split. The button label is defined because this element goes into a Tab element. A tab can contain one or more visualization widgets. The tab’s “button_label” property is a label that will appear to select between different visualization tabs in the QMENTA Platform.
Tab(): Configure a layout with tabs to showcase different results. Buttons with labels allow users to select different tabs, and elements in each tab must have thebutton_labelparameter defined.
# Remember to add the button_label in the child objects of the tab.
tab_1 = Tab(children=[split_1, html_online])
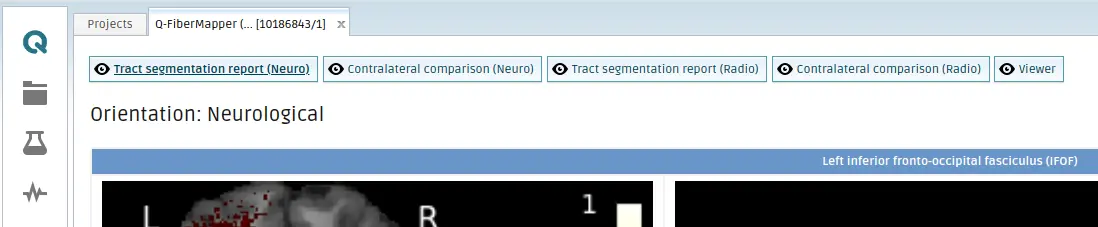
Tabs appear as buttons on the QMENTA Platform, click on them to switch to the desired tab.
Add the tools to visualize files using the function add_visualization. The different widgets that can be included are:
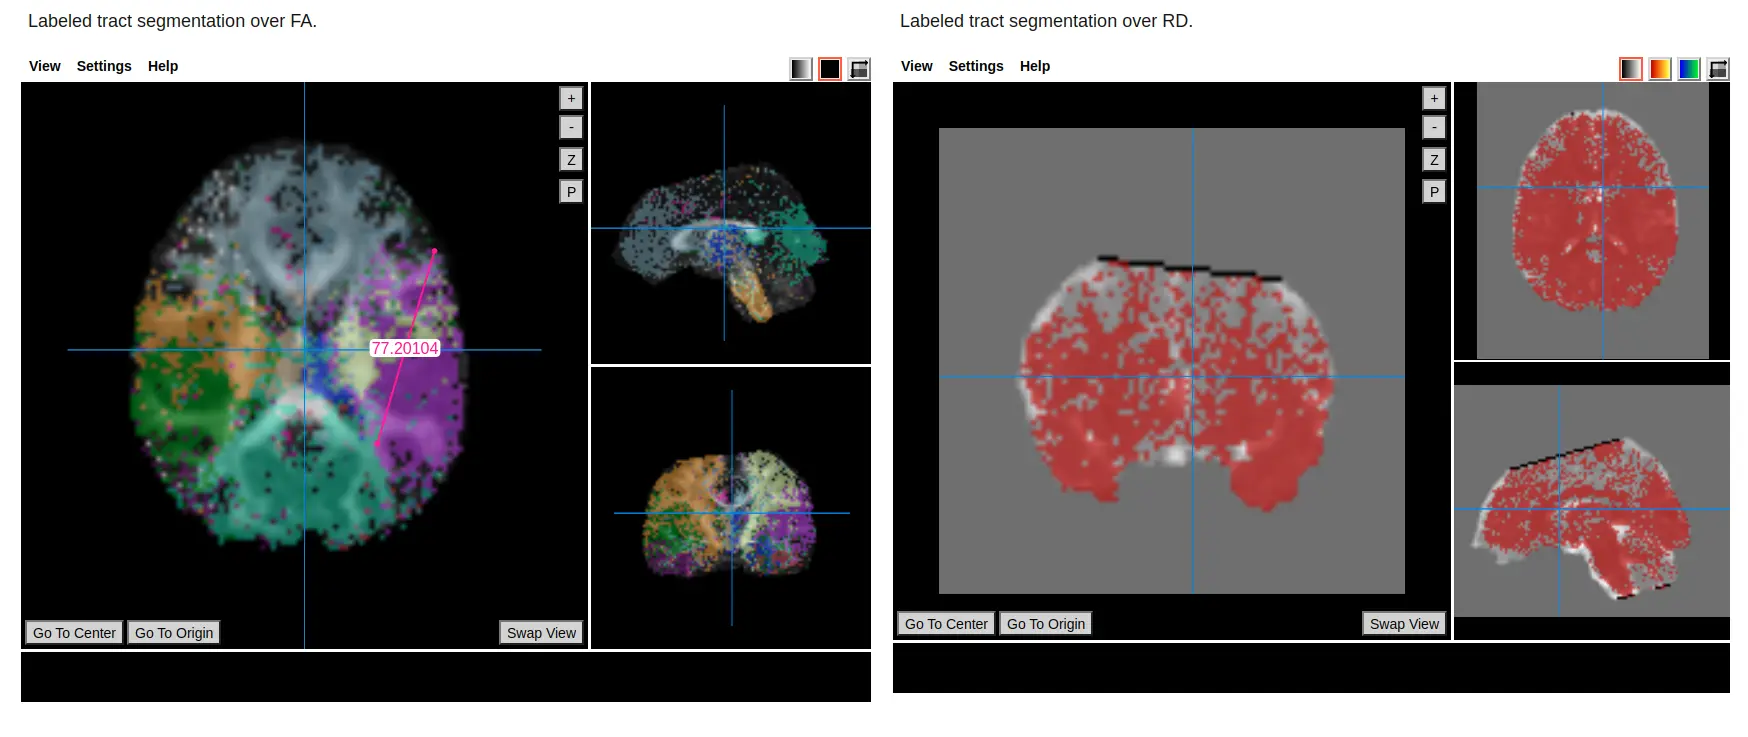
PapayaViewer(): Online 3D volume viewer to visualize DICOM or NIfTI files. Add as many layers as you want, they are going to be loaded in the order that you add them. You can use modality or tag of the output file to select the file to be shown in the viewer.
papaya_1 = PapayaViewer(title="Tissue segmentation over T1", width="50%", region=Region.center)

papaya_1.add_file(file="T1brain.nii.gz", coloring=Coloring.grayscale)  # using the file name
papaya_1.add_file(file="tissueSegmentation.nii.gz", coloring=Coloring.custom)
# Add the papaya element as a visualization in the results configuration object.
result_conf.add_visualization(new_element=papaya_1)

papaya_2 = PapayaViewer(title="Labels segmentation over T1", width="50%", region=Region.right)

papaya_2.add_file(file="m'T1'", coloring=Coloring.grayscale)  # using the file modality
papaya_2.add_file(file="t'seg'", coloring=Coloring.custom_random)  # using file tag
# Add the papaya element as a visualization in the results configuration object.
result_conf.add_visualization(new_element=papaya_2)
To include an online HTML report, leverage the HtmlInject class.
HtmlInject(): HTML file will be presented in the QMENTA Platform for online reporting. Images used in this HTML must be uploaded into the output container and their paths defined in the HTML code must match the path in the output container.
html_online = HtmlInject(width="100%", region=Region.center, button_label="Report")
html_online.add_html(file="online_report.html")
# Add the html inject element as a visualization in the results configuration object.
result_conf.add_visualization(new_element=html_online)
To finish, the configuration file gets written using the following method.
# Call the function generate_results_configuration_file to create the final object that will be saved in the tool path
result_conf.generate_results_configuration_file(
    build_screen=tab_1, tool_path=self.tool_path, testing_configuration=False
)
Please refer to the example in the generated tool.py sample to see this example implemented.
Further details about this tool section are available in the Results Configurator section.
Local testing guidelines
Local testing of your tool is a crucial step in the tool development
process. When launching the Tool Maker for the first time, an example is
generated, resulting in a local/test/ folder containing all necessary
components. To conduct local testing, follow these steps:
Populate the
local/test/sample_data/folder with the required input data.Adapt the test input requirements to align with the defined
tool_inputs()method in your tool.Utilize the
file_filter_condition_namein theTestFileInputobjects to specify the file/s for input.
For example, if I have the following add_input_container(...) definition:
self.add_input_container(
  title="Morphology input files",
  info="Requirements: T1 and T2 flair",
  anchor=1,
  batch=1,
  container_id="input_morphology",
  mandatory=1,
  file_list=[
      InputFile(
          file_filter_condition_name="dicom_t1_condition",
          filter_file=FilterFile(
              modality=Modality.T1
              regex=".*.zip",
          ),
          mandatory=1,
          min_files=1,
          max_files=1,
      ),
      InputFile(
          file_filter_condition_name="dicom_t2_condition",
          filter_file=FilterFile(
              modality=Modality.T2,
              tags=[Tag("flair"),
              regex=".*.zip",
          ),
          mandatory=1,
          min_files=1,
          max_files=1,
      ),
  ]
)
The definition of my TestFileInput could be:
"input_morphology": {
    "files":[
         TestFileInput(
             path="T1mprage.zip",
             file_filter_condition_name="dicom_t1_condition",
             mandatory=1
         ),
         TestFileInput(
             path="T2f.zip",
             file_filter_condition_name="dicom_t2_condition",
             mandatory=1
         )
    ],
    "mandatory": 1,
}
And the files T1mprage.zip and T2f.zip they should be stored in the
local/test/sample_data/ folder. To run the test, you can use pytest with
the following command:
pytest path_to_test_file::TestTool::test_basic_call
After running the test locally, new files are automatically generated.
settings.json: Generated during local testing, this file captures the input definitions from thetool_inputs()functions and stores them in JSON format.results_configuration.json: Updated when runningtool_outputs()(along withrun()), this file defines the tool’s output visualization configuration in JSON format.
Test Folder Structure
The Tool Maker generates three folders within a folder named after your test (e.g., test_basic_call):
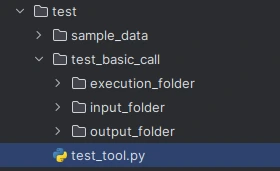
The
test_basic_call/input_folder/is a simulation of the input container of the QMENTA Platform. The Tool Maker will structure the files specified in the TestFileInput objects in folders named after their container id, in this caseinput_morphology.The
test_basic_call/execution_folder/produces runtime files, copying files from theinput_folder/to simulate tool behavior.The
test_basic_call/output_folder/: local representation of the output container, saving files for upload as final results.
Local testing using Docker
The docker container test can be launched after the local testing is
performed properly. The docker is going to be run locally in your
computer. By using the same test name (e.g. test_basic_call) it will
utilize the same test_basic_call/input_folder/ and test_basic_call/output_folder/ as the previous local test to
perform it.
pytest path_to_test_file::TestToolDocker::test_basic_call
The file local/test/Dockerfile will be used to run the docker.
You can confirm using the command $ docker images that the image has
actually been created.

The notation for associating a local Docker image with a repository on a registry is: username/repository:tag. However, for clarity reasons, this documentation uses the following syntax to name images: username/tool_name:version
Before pushing the docker image to the docker repository, apply proper tagging to the docker image:
docker tag tool_id:version docker_username/tool_id:version
Push the docker image to a docker registry, such as Docker Hub:
docker push docker_username/tool_id:version
Learn more about working with Docker Docker documentation.
Publish your tool in the QMENTA Platform
Note
To complete this step you will need to have an account in QMENTA Platform and have the ability to deploy tools enabled.
If you don’t have it, contact us at support@qmenta.com in order to grant you developer privileges to add tools to the QMENTA Platform.
You can publish your new tool using the API or the QMENTA frontend. If you have generated the tool using the Tool Maker and tested it, you have all the files you need to integrate it into the QMENTA Platform using the following command from the SDK:
$ tool-publisher

This is the user interface to publish the tool.
QMENTA Platform credentials
Username: The email that you use to log in the QMENTA Platform.
Password: The password that you use to log in the QMENTA Platform.
- Select tool folder
A dialog will open to allow you to select the tool folder. Choose it and then click on “OK”.
- Specify the tool ID
The unique tool ID (without spaces or special characters). Your username will be automatically pre-appended to your analysis code (you do not have to worry about coinciding with other users’ tools).
Example:
dl_morphology_analysis_stable
- Specify the tool version
Your version identifier. Typically, a MAJOR.MINOR which will not change. Even though you can update the Docker image later on, we recommend creating a new tool with a different MAJOR.MINOR if the Docker image has significant changes.
Example:
1.7
- Specify the tool version name
The full name of your tool.
Example:
DL Morphology Analysis
- Cores required
The number of CPU cores allocated to the tool.
Example:
2
- RAM required in GB
The amount of memory allocated to the tool. Please note that this is a hard limit. If the Docker container tries to allocate more memory it will be killed and the analysis will be reported as failed.
Example:
4
- Docker image Name
The full image name (username/tool_name:version_tag).
Example:
janedoe/dl_morph:1.7.21
- Docker registry URL
The registry where your images (repositories) are stored.
Example:
hub.docker.com
- Docker registry User
Your registry username.
Example:
janedoe
- Docker registry Password
Your registry password. The Docker credentials are used to pull the Docker image to be able to run the tool.
Provide the required information and click on Publish in QMENTA Platform.
The tool should be accessible now through the frontend. You can also create/edit the tool using the QMENTA Platform front-end, please refer to the SDK documentation section.
Publish a workflow in the QMENTA Platform
A workflow allows you to concatenate several tools to create a more complex pipeline. Here is an example of a workflow in the QMENTA Platform:
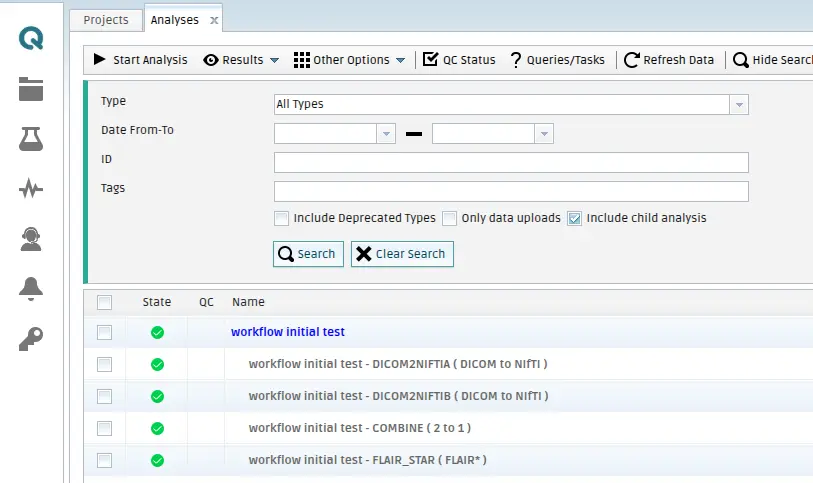
Workflow as displayed in the Analysis tab of the QMENTA Platform.
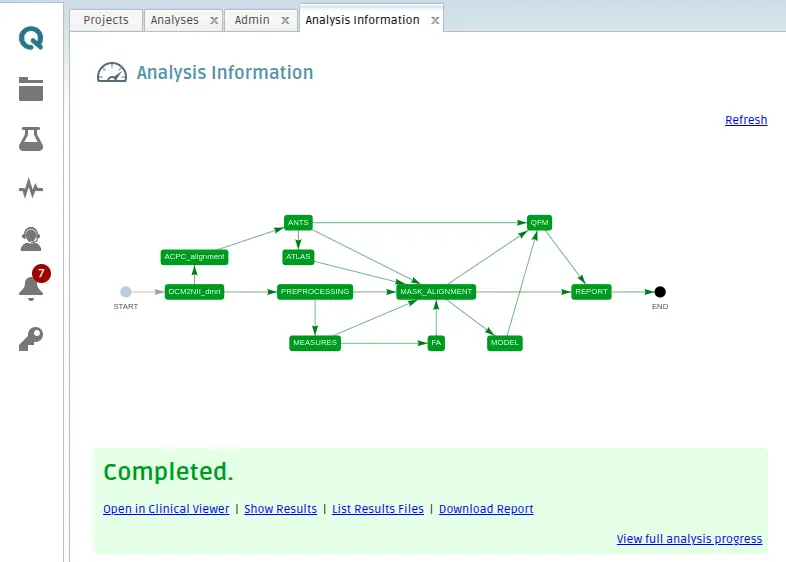
Diagram showing the different steps of a workflow. In the QMENTA Platform you can also see the state of the tools inside a workflow (pending - gray, running - blue, completed - green, failed - red). This image is shown by right-clicking the workflow in the Analysis tab and going to Analysis Information.
Workflow Development
The workflow is composed of multiple files that need to be manually created. For the workflow publisher to function correctly and automatically publish the workflow to the platform, these files must adhere to the specified naming conventions, otherwise the files will not be detected.
Settings (settings.json)
The information on how to write the settings can be found in the SDK documentation website: Parameters and Input Files — QMENTA SDK Build An example can be found here: settigs.json
Result Configuration (results_configuration.json)
All you need to know about writing the result configuration in the QMENTA Platform can be found in the SDK documentation page: Adding a tool to the QMENTA Platform — QMENTA SDK Build
Description (description.html)
The description file is an html file that contains the overall information about the tool. You can add your logo here as well. See the following example:
Model (model.flow)
Example of a model
start {
     feed : [
                 "input_t1"  =>  DICOM2NIFTIA("input"),
                 "input_t2"  =>  DICOM2NIFTIB("input")
            ],
     x:0,
     y:50
}

end E {
     x : 100,
     y : 50
}

analysis DICOM2NIFTIA {
    type: "userid_dicom2nifti:1.7",
    qa: False,
    output: [COMBINE("input_0")],
    x: 25,
    y: 75,
     settings: {
            input: "c_input((m'T2',t'flair'))"
        }
}

analysis DICOM2NIFTIB {
    type: "userid_dicom2nifti:1.7",
    qa: False,
    output: [COMBINE("input_1")],
    x: 25,
    y: 25,
     settings: {
            input: "c_input(m'T1')"
        }
}

analysis COMBINE {
    type : "userid_combine_containers:1.4",
    qa : False,
    output : [ FLAIR_STAR("input") ],
        x : 50,
        y : 50
}

analysis FLAIR_STAR {
    type : "userid_flair_star:1.0",
    qa : False,
    output : [ E ],
        x : 75,
        y : 50,
        parent_output: True,
        settings: {
            input: "(c_FLAIR((m'T2',t'flair')) AND c_EPI(m'T1'))"
        }
}
How it will be seen in the QMENTA Platform:
Each part of the model node syntax explained:
analysis FLAIR_STAR {
    type : "userid_flair_star:1.0",
    qa : False,
    output : [ E ],
        x : 75,
        y : 50,
        parent_output: True,
        settings: {
            input: "(c_FLAIR((m'T2',t'flair')) AND c_EPI(m'T1'))"
        }
}
analysis FLAIR_STAR:
This line indicates a new box in the workflow.
FLAIR_STAR is the node name that will appear in the workflow.
It is the reference ID (must be unique in the workflow) to reference the node.
type : “userid_flair_star:1.0”:
Here is the tool ID and the version that must match an existing box in the QMENTA Platform.
qa : False:
Boolean parameter to indicate if it is a QA step.
When the tool finishes successfully, the workflow will wait for the user to change the analysis QC status to PASS to resume the analysis.
If the QC status is marked as FAIL, the workflow will stop and be marked as Exception.
output : [ E ]:
This tells the workflow where the output container must be sent next.
In this case, it is the node E, which means it is the End of the workflow.
output: [COMBINE(“input_0”)]:
In this case, the output of the tool is sent to the node assigned with the ID COMBINE.
That node has a box with an input type of setting with an ID named input_0, which will receive the data and process it with the corresponding file filter.
x : 75, y : 50:
Coordinates relative to the other nodes that are used to create the workflow (as seen in the image above).
parent_output: True: - This value is only added in the last box that will run in the workflow. - Once this box finishes, the workflow will know it has reached the end. - One node must have this setting; otherwise, the workflow will never be marked as successfully completed.
settings: {input: “(c_FLAIR((m’T2’,t’flair’)) AND c_EPI(m’T1’))”}: - The settings of each box in each node can be overwritten. - In this case, the input setting with ID input is changed to accept other kinds of data than the default ones by the box. - Other parameters can be added in this dictionary, but they must match the setting parameters of the box in that node.
The start and the end node, work a little bit differently.
start {
     feed : [
                 "input_t1"  =>  DICOM2NIFTIA("input"),
                 "input_t2"  =>  DICOM2NIFTIB("input")
            ],
     x:0,
     y:50
}
The start node has a feed field which describes the connectivity of its input to the first box. In this case, the workflow has 2 inputs and they are connected to different nodes. The first nodes have dicom to nifti tools, with input setting with id “input”.
end E {
     x : 100,
     y : 50
}
The node “E” only requires the coordinates where to place the node in the workflow of the QMENTA Platform.
Workflow publishing
You can integrate your new workflow using the API or the QMENTA frontend. If you have the required files for the workflow you can use this tool to integrate it into the QMENTA Platform using the following command from the SDK:
$ workflow-publisher
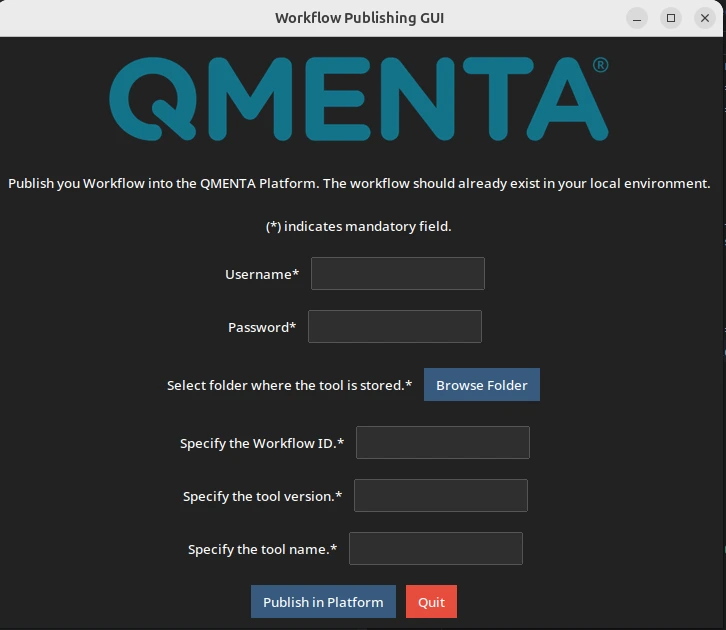
This is the user interface to publish the tool. Provide the required
information and click on Publish in QMENTA Platform. The tool should be accessible now
through the frontend. You can also create/edit the tool using the
QMENTA Platform front-end, please refer to the SDK documentation
section.